How to configure Hyper-V Virtual Switch

The Hyper-V virtual switch functionality can be set up in three ways: external, internal and private.
EXTERNAL: External virtual switch binds to a physical NIC that is installed onto the Hyper-V Server. VMs can directly communicate with the rest of the network.
INTERNAL: VMs are not connected to the physical network and so the traffic generated in this switch cannot communicate outside the host system. VMs that are connected to the virtual switch can talk to each other and with the Hyper-V host itself, but not beyond.
PRIVATE: VMs connected to this virtual switch are unable to talk to any of the physical NICs and also unable to communicate back with the Hyper-V host. Any VMs that you plug into a private switch will be able to communicate with each other and nothing else.
We can connect Virtual Switch to a single physical interface of server or to multiple interfaces called NIC Team.
To create an external/internal or private virtual switch, open the Hyper-V Manager and from the action pane on the right-hand side, click on Virtual Switch Manager.

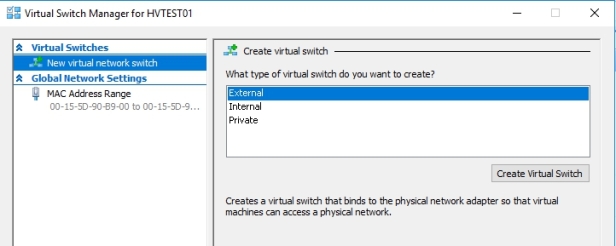
I will create External Virtual Switch. Click on Create Virtual Switch. I have renamed my external virtual switch so that it is easier to identify when I decide to add additional NICs to this server in the future.
OBS!!! You may check the Allow management operating system to share this network adapter checkbox, if you have a server that has a single NIC. If you have only one physical NIC and you uncheck this option you will need to visit the server room to remotely take control of the server. Best practice is to have at least 2 NICs. One for the management and one for the VM communication.
 After selecting all the configuration parameters, click on Apply and then on OK
No comments:
Post a Comment