How to Install Windows Server 2016

Attach the ISO of the Windows Server 2016 to the virtual machine and power on the virtual machine. (If you are not familiar with Hyper-V, please take a look on my Deep Dive into Hyper-V 2016 series)
First thing to choose is the language, time format and keyboard. Select the appropriate information and click next.

Click Install now .

The next screen is an interesting one and it is very important to choose right. What we can see here is that we have 2 different installation options for Windows Server 2016. Windows Server 2016 Standard/Datacenter is actually what we have known to be the Core installation and if you just click next, next.. you will find yourself in the end with an installation of Server Core.
If your goal is Server Core than this is the right option for you. Second option Windows Server 2016 (Desktop Experience) is the full Windows Server graphical interface and that is the option we want to choose for the purposes of this series.
OBS!!! In some previous versions we had the ability to migrate back and forth from a full GUI to Server Core and back again, even after the operating system was installed. THIS CAN’T BE DONE IN WINDOWS SERVER 2016 so plan carefully from the beginning.

Accept the license terms and click next.

Select Custom installation since this will be a new installation.

Select the Drive partition where you want Windows installed and click Next

Server installer will copy files, install features, and get everything ready on the hard drive and will finish the installation by asking for a new password for the Administrator account.

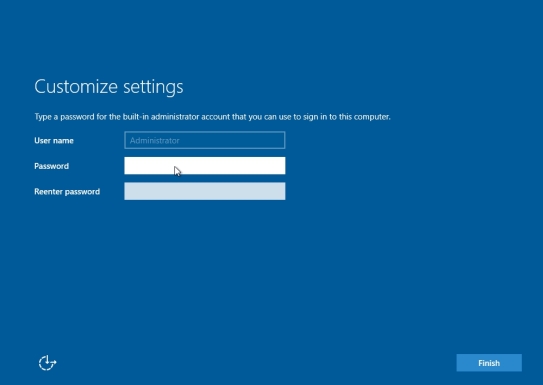
Once you choose a password, you will find yourself on the Windows desktop. Server Manager will launch after you have logged in.

In the next part of this series we will give some power to our server by installing Active Directory and configuring domain.
No comments:
Post a Comment