How to Install and configure Active Directory Certificate Services 2016 – Part2

In the first Part 1 of this series, we’ve installed and configured Certificate Authority. Now we will move forward and take a look on Certificate Templates.
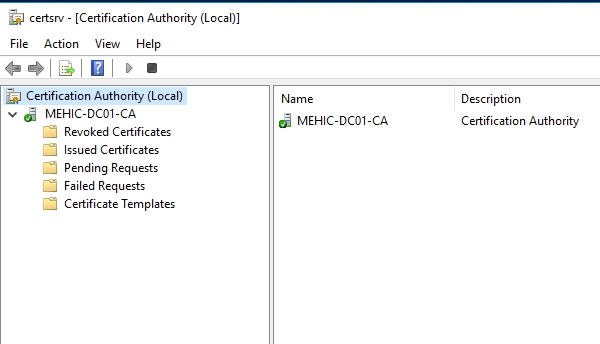
Open Server Manager –> Tools –> Certificate Authority

Notice we’ve got our server here, mehic-dc01-ca and it’s here where we can take a look at any certificate that have been revoked, those that have been issued, any pending requests if we require administrator approval on any request that come in, any failed request and then the list of certificate templates that are available to be issued right out of the box.
- Exploring Certificate Templates
We have a variety of different forms that are possible for us to fill out.

All of these are those that are available to be issued. Now where people get confused is the templates that are available, the total number of templates that are available are much larger than those that are available for issue.
If I right-click on Certificate Templates and choose to Manage here, you can see that there’s a whole variety of certificate templates that are available here within a right-out-of-the-box ADCS Infrastructure.


Not all of these are available for issue, only the ones that we’ve specifically set that are in the other screen are those that are available for issue. It is these templates and the settings in these templates that define the form that will later fill out when we want to request and then receive a certificate.
Let’s see how we can create our own custom template. We will start by duplicating one of the existing out-of-the-box template. When we need to create , for example, a certificate template that deals with computer certs, I would start by duplicating the template and then changing the name, like Computer for Mehic.se
Right-Click on Computer template and choose Duplicate Template

Properties of New Template will pop-up.
General Tab
There’s a couple of things that I just have to do right off the bat, and that is to change the name and check my validity period and my renewal period.
Are these indeed the longest maximum time I want the cert to be valid for, and then when its renewal period will be. We have option to publish cert into Active Directory so it can be retrieved from there if for one reason or another the user should lose it or need to re-access that cert.
Do not automatically reenroll … It is important one here. If you find users creating multiple cert requests for the same cert over and over again.

Compatibility Tab
Here we can adjust what the compatibility settings will be for this cert. Very obviously, later compatibility version will include other features that don’t exist in earlier compatibility versions. When I make these selections, these will give me additional functionalities, but will remove the abilities of older OS of using those certs.

Request Handling Tab
Here we can define some of the charactheristics of the cert itself, like whether or not the private key should be exported, whether it’s renewed with the same key or if I want to archive the subject’s private key or not.

Cryptography Tab
Here we can change crypthography settings just like we did before with the CA cert itself when we was installing CA.

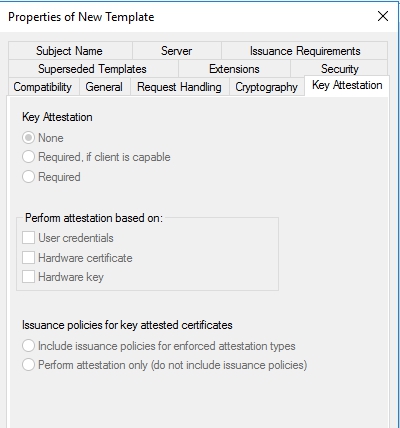
Key Attestation Tab
Key attestation is the ability of the user who is requesting a certificate to cryptographically prove to a CA that the RSA key in the certificate request is protected by either “a” or “the” TPM that the CA trusts.
Superseded Templates Tab
There may be times when you want to modify the properties of a type of certificate that has already been issued to clients. You can do this by creating an updated certificate template for that certificate purpose and specifying that you want subjects of certificates based on the old template to obtain new certificates based on the new template. This procedure forces subjects to obtain a new certificate before the renewal date specified in the original certificate template.

Extensions Tab
Here we can choose which extensions that this cert template are going to support, or effectively which uses this cert are valid for.

Subject Name Tab
It should be for the cert and how that Subject Name is defined, so if you going to build the subject name from AD Information, so would it be the DNS name of the server or the FQDN of the server or common name.
Do you also want to include a subject alternate name as well, that can be the email name or the DNS name etc.

Supply in the request –> if you ever want to go about choosing to allow the user to supply that information as part of their cert request, you can then choose this top box up here. This will present the user with a dialog box requesting the user to enter in what Subject Name information they want baked in the cert at the moment the cert is created.

Now just a second ago when I clicked up here, I saw a little error box that pops up that says look, anytime you’re doing supply and the request as part of a subject name, you’re effectively oppening up the world to that user to generate a cert with any subject name they can think of to plug in. And that can not be a great idea, and so if you plan on choosing supply in the request you might want to go about changing some of the rules that define who should approve a cert before it gets issued. Those rules can be determined under Issuance Requirements Tab.

Issuance Requirements Tab
On this tab we can say, when a user attempts to request a cert for issue, does a CA cert Manager require approval of that cert first, and are there actually a number of authorized signatures that are required before we go about issuing the cert? Also, if we need to reenroll the cert are we going to use the same criteria. Each of these determines an extra added step or an extra added level of security that can be added in.

Server Tab
There are only 2 options which can be selected, whether certificates should be stored in the database or whether revocation information should be in issued certs.

Security Tab
Real meat and potatoes happens here where we can define who has the privilages to Read, Enroll, Autoenroll or even to Write Information into the cert. Be aware when you’re creating these cert templates that security privileges are actually configured on the template itself, as well as on the CA. I will select that users will be able to read and enroll for this cert.

If we look at properties under mehic-dc01-ca

Security Tab

This Tab defines which users will be able to perform which functions so you may need to have some combination of privileges that are defined at the CA level, as well as at cert level should you begin to include some of the extra features, like Certificate Managers and Issuance Requirements.
Now when we click OK our cert Computer – Mehic.se is available in the console and ready to be made availalbe for issue.

This happens back here under the Certification Templates console under New Certificate Templates to issue.

Here we identify the templates that we just created. click on it and click ok

It will appear in the list of available templates

Let’s go over to the client machine and run mmc

File –> Add/Remove Snap-in. Click on Certificate –> Add –> Computer Account –> Next
Expand Certificate and Right-Click on Personal –> All Tasks –> Request New Cert

Before you begin page will pop-up. Click Next
On Select Certificate Enrollemet Policy page click next
On Request Certificate Page, will will see our cert template. Click on it and click Enroll and Finish.

Here is our cert

No comments:
Post a Comment